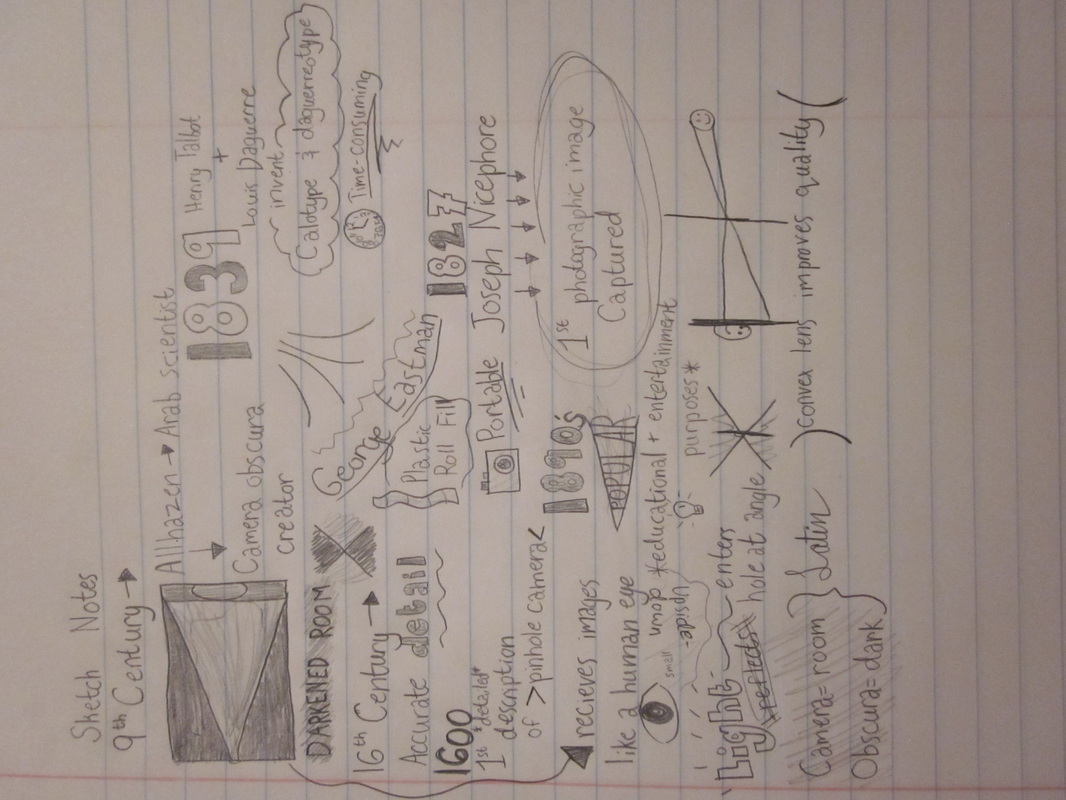

Sketch Notes |
Steps to build a camera obscura
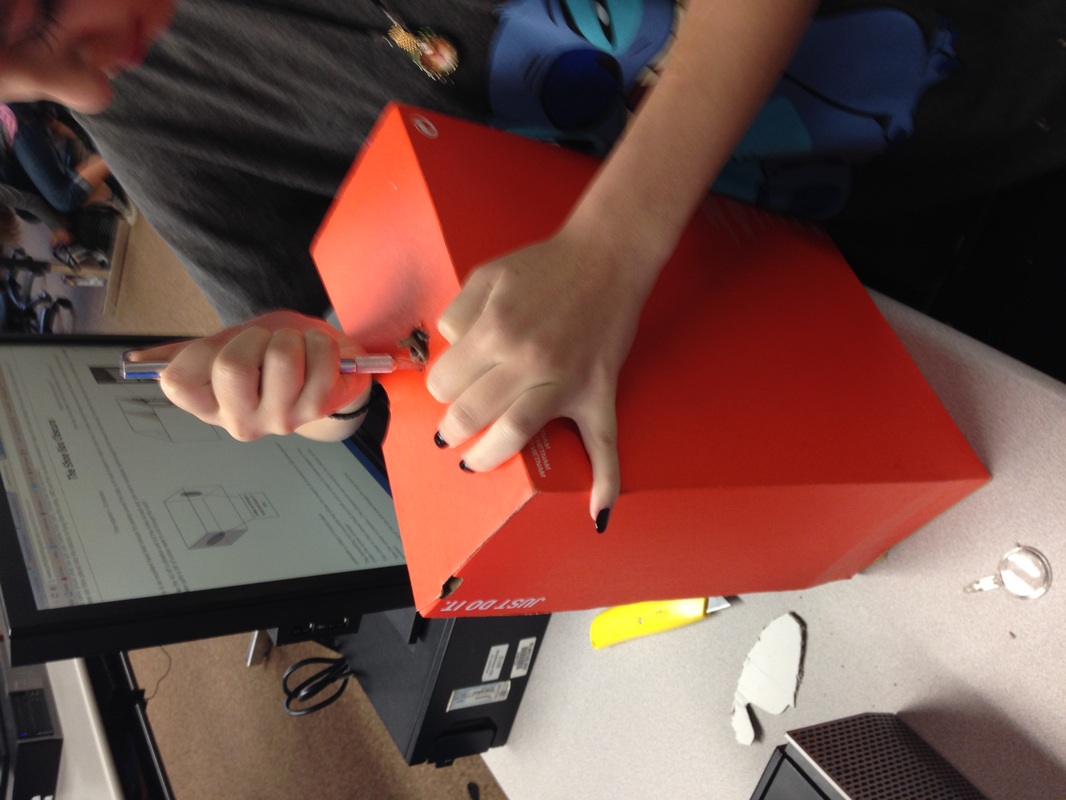
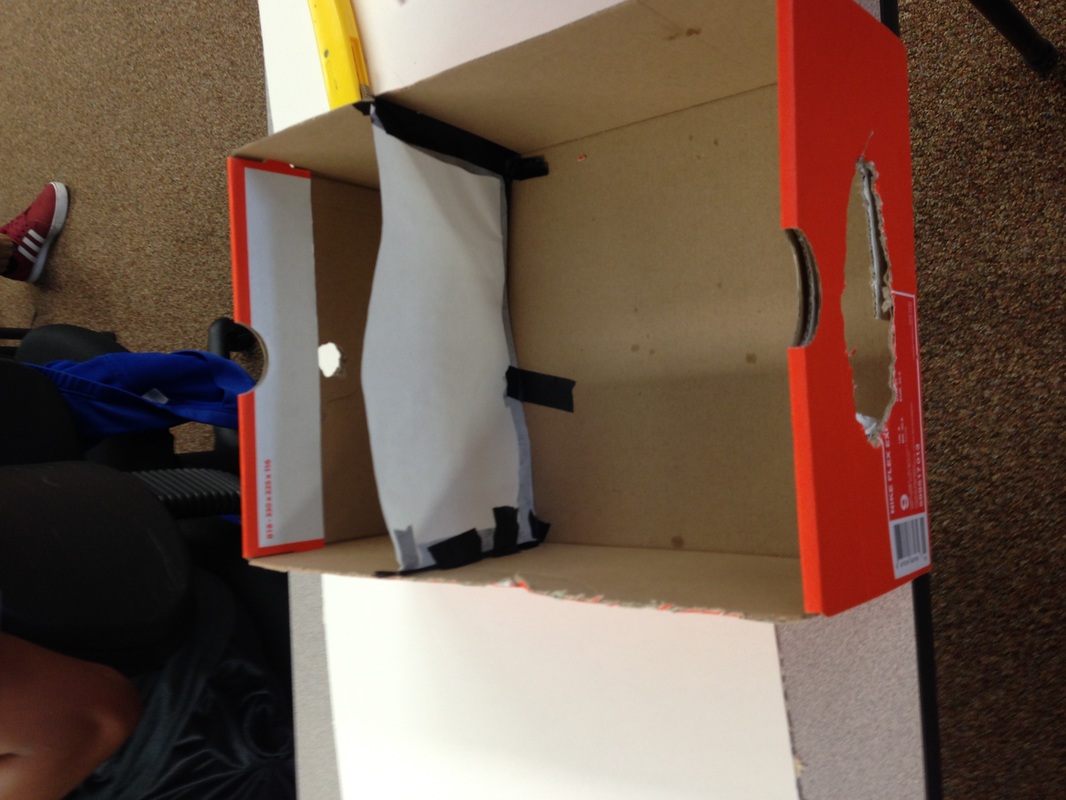
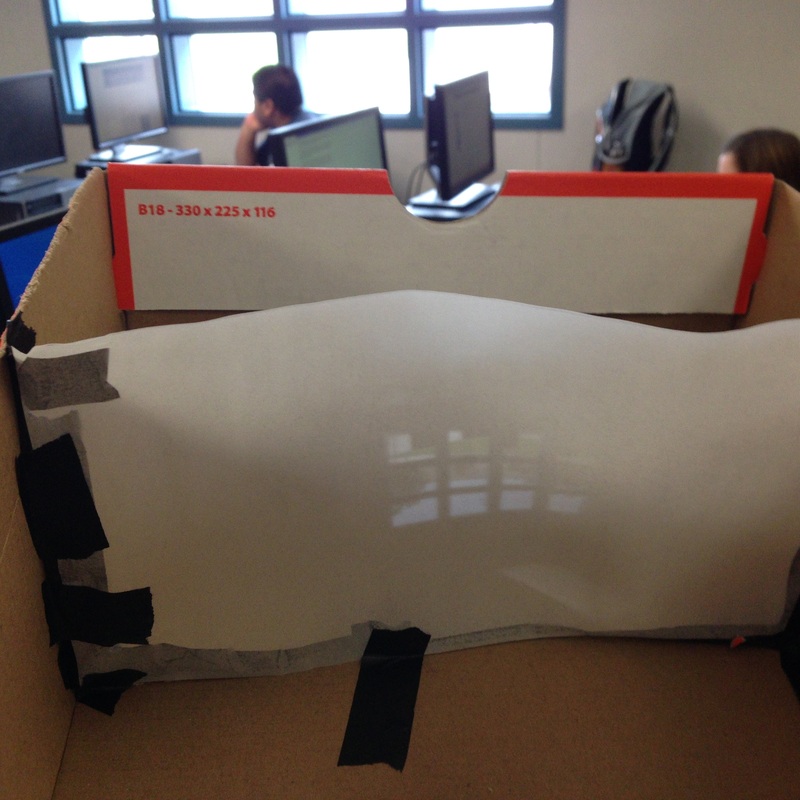
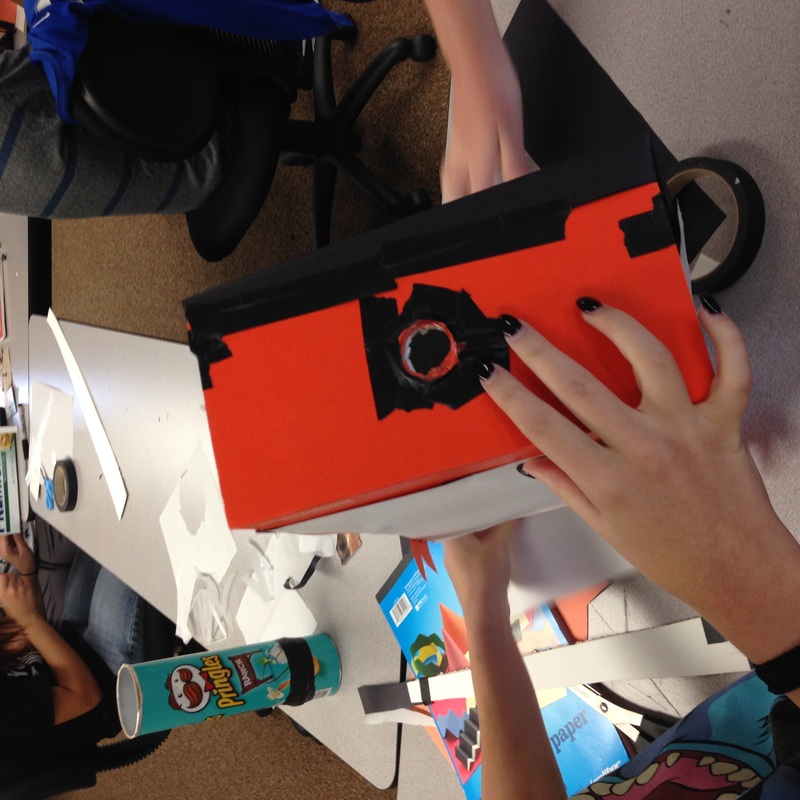
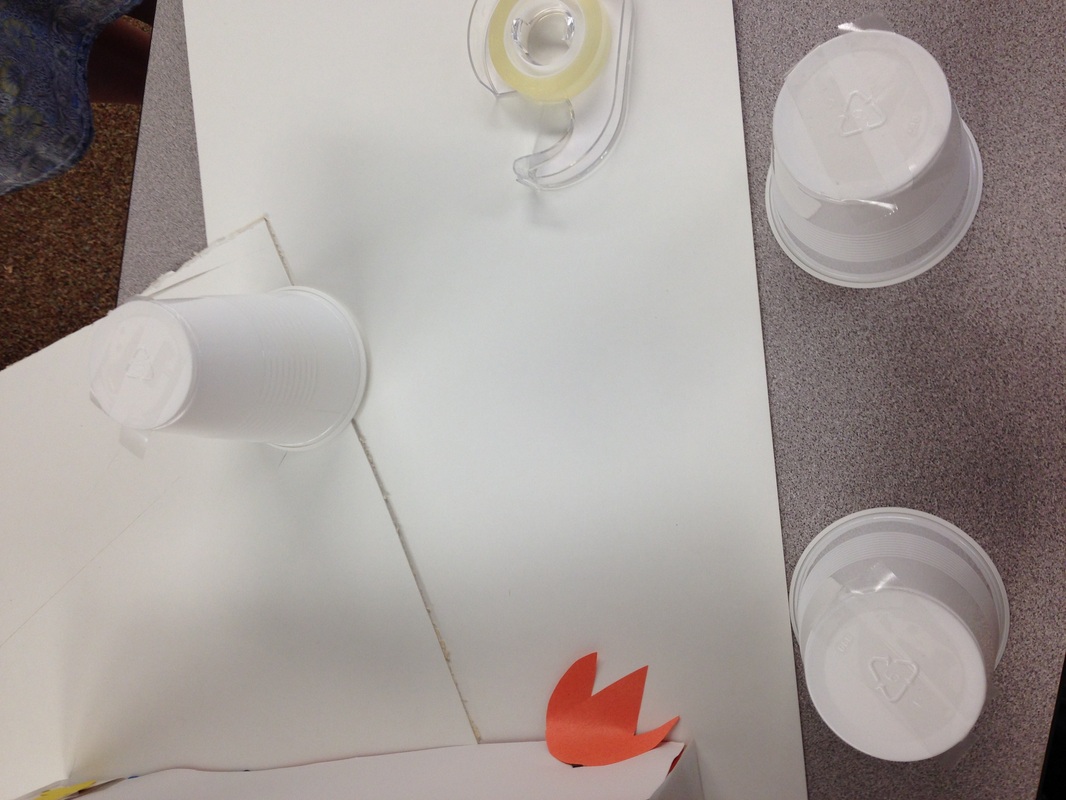
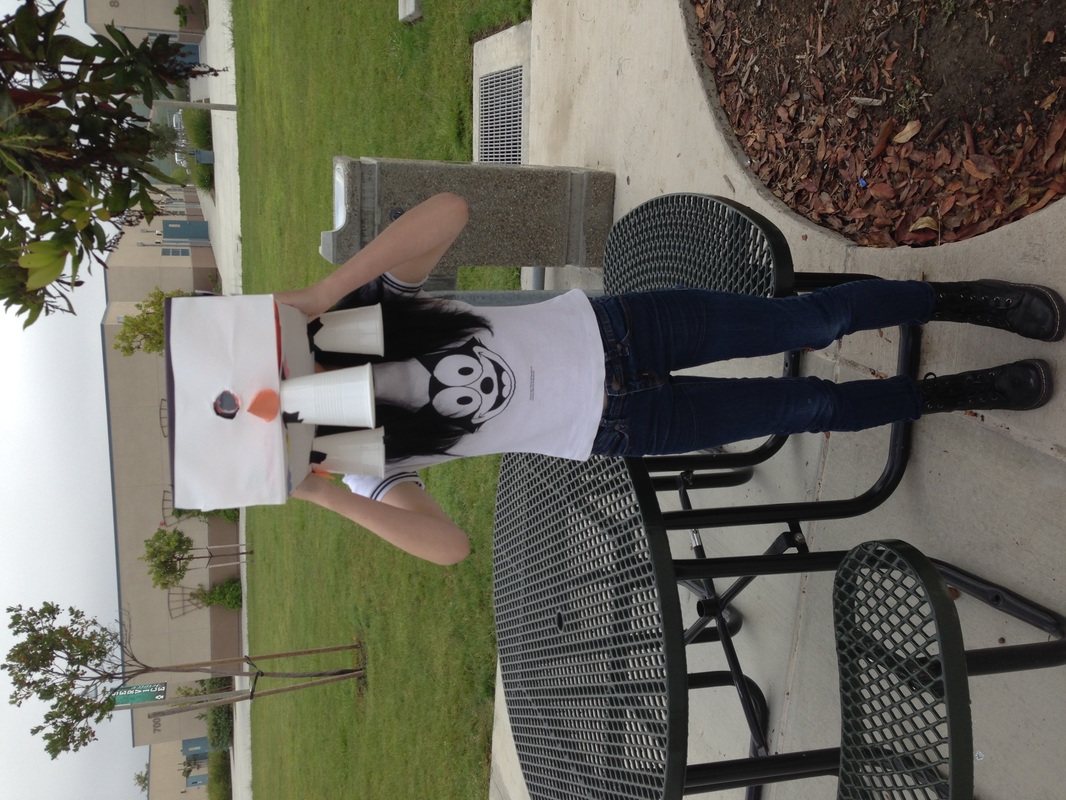
We started this project by first cutting a hole in the side of the box to see through. We also cut a smaller hole on the opposite side of the box to put the lens over. Use a small magnifying glass as the lens and measure the focus distance before putting in the screen. Use tracing paper as a screen, make sure that is is not folded. Cut the tracing paper to the size of the box you are using and use black tape and tape the paper to each side of the paper to the box. Then tape the bottom of the tracing paper to the inside bottom of the box. Here is an example of the step above. After putting in the screen, we put a layer of black construction paper over the box to block out light. This makes the image in the camera more vivid. To keep the light from washing out your picture use black construction paper and cover the whole to of the box. that the paper down using back tape and make sure that no light is getting in. If there is any light getting in use black tape to cover the whole were the light is getting in. If the whole is too big to be covered with tape use black construction paper and the tape the edges of the paper to the box. Make sure no light except the piece you cut out for the viewing is getting in. Know comes the fun part, decorating. Use white construction paper to cover the bottom and sides of the box. Make sure to tape the paper to the box to cover up the color of the shoe box or box you are using. After decorating the camera obscura, tape three cups to the bottom as a stand to make it stationary. Here is a photo of the step above. After following all these steps, your camera obscura is complete! Here is a picture of what the inside looks like. This is a picture without the top on the camera obscura. here is another example of it being used. |